Well, what a surprise, today didn't go to plan...ever had one of those days? They seem to be more common for me lately! On the cards for today was supposed to be some quality time playing with Cernit to see what canes I could come up with, instead it was spent popping out to an appointment that I'd completely forgotten about until I looked at my diary over breakfast, followed by an unexpected translation for one of Efco's new Fofucha kits. They have loads now, including a fox, chick, hen, rooster and funky owls. So if you like working with foam sheets it's worth keeping an eye out for them as they make their way into the shops.
I hope everyone has a lovely weekend full of wonderful crafting exploits. I certainly plan to make up for today and have a play with polymer clay. Hopefully I will be able to share the results with you all next Friday. :)
Happy Crafting one and all!
Friday, 16 January 2015

Friday, 9 January 2015
Happy Crafty New Year!
Well that's the festivities over for another year! These last few weeks have been totally manic with jetting to and from Norway and various festive family gatherings. I hope you have all had a lovely holiday season and I wish you all a very Happy (if somewhat belated) 2015! I hope, too, that you were lucky enough to get some wonderful crafty pressies for Christmas...I myself am now the proud owner of a Silhouette Cameo (can't wait to get to grips with it!). I've also been spending the last week updating some of my equipment (who knew updating a laptop could take sooooooo long, groan).
As I haven't managed to get back into full crafting mode this first week of 2015 (I don't know about you but I really miss the buzz when I'm not being creative!) I thought I'd share a few of the wonderful new products Efco have lined up for us crafters. I promise they'll be some fab new project sheets heading your way soon, so watch this space...
In the meantime take a look at a few of Efco's new jewellery blanks which are ideal for anyone into polymer clay...


This last pendant is designed to work with their rubber necklace which now comes in a transparent silver colour as well as black.
And then there's these fab new stencils which are perfect for anyone into mixed media canvas work or scrapbooking...


They are two part stencils with varied backgrounds and girl silhouettes which can be used in either their positive or negative form.
If you or anyone you know loves butterflies then I'm sure they will love this new stencil too...

Isn't it simply divine?! (And it's only one of many new stencils added to the Efco range!)
I can't wait to start work on the projects I have planned for some of the above. :) (But they will have to wait a couple more days as I'm taking the weekend off... What?! I hear you say, Already so soon! Well, yes, I'm afraid so. You see my cousin invited me to spend the weekend with her to celebrate my birthday so I thought it would be churlish to refuse, don't you? ;) Anyway, I will be back to full-time creative mode on Monday so watch this space for some great new creative inspiration, and maybe some news on an amazing top secret new product Efco is launching this year ;)
And, once again, I wish you all a very Happy, Healthy but most of all Crafty New Year!
As I haven't managed to get back into full crafting mode this first week of 2015 (I don't know about you but I really miss the buzz when I'm not being creative!) I thought I'd share a few of the wonderful new products Efco have lined up for us crafters. I promise they'll be some fab new project sheets heading your way soon, so watch this space...
In the meantime take a look at a few of Efco's new jewellery blanks which are ideal for anyone into polymer clay...
And then there's these fab new stencils which are perfect for anyone into mixed media canvas work or scrapbooking...
They are two part stencils with varied backgrounds and girl silhouettes which can be used in either their positive or negative form.
If you or anyone you know loves butterflies then I'm sure they will love this new stencil too...
Isn't it simply divine?! (And it's only one of many new stencils added to the Efco range!)
I can't wait to start work on the projects I have planned for some of the above. :) (But they will have to wait a couple more days as I'm taking the weekend off... What?! I hear you say, Already so soon! Well, yes, I'm afraid so. You see my cousin invited me to spend the weekend with her to celebrate my birthday so I thought it would be churlish to refuse, don't you? ;) Anyway, I will be back to full-time creative mode on Monday so watch this space for some great new creative inspiration, and maybe some news on an amazing top secret new product Efco is launching this year ;)
And, once again, I wish you all a very Happy, Healthy but most of all Crafty New Year!
Friday, 12 December 2014
Christmas is coming...
So, last week ended up a little crazy...flew back from Norway (brrr...it's cold there!), saw my niece perform at the Barbican in her school's 120th anniversary celebrations and my nephew at his school's Christmas show, hence why Friday came and went in a blur.
This week with Christmas just under 2 weeks away I thought it might be worth taking a look at Christmas decorations...some to make yourself whilst others you could make with the kids :)
Efco have brought out some new Papp Art festive shapes this year which I think are great - some are napkin rings whilst others work with their 4cm plastic baubles...
 Aren't these cute...just perfect for kids to decorate don't ya think?!

And when these are decorated they can look something like this...


You can fill the baubles with confetti, chocolates or even very small gifts like jewellery - just perfect to make your Christmas tree extra special this year!
Of course you could always make some fir cone choirboys...

or some cotton ball snowmen...

or how about napkin decoupaging Efco's plastic medallions...

or if you enjoy needle felting you could always try your hand at needle felting Efco's polystyrene balls!

You will find project sheets for these in the Special Occasions section of Projects4Crafters.com.
This week with Christmas just under 2 weeks away I thought it might be worth taking a look at Christmas decorations...some to make yourself whilst others you could make with the kids :)
Efco have brought out some new Papp Art festive shapes this year which I think are great - some are napkin rings whilst others work with their 4cm plastic baubles...
And when these are decorated they can look something like this...
Of course you could always make some fir cone choirboys...
or some cotton ball snowmen...
or how about napkin decoupaging Efco's plastic medallions...
or if you enjoy needle felting you could always try your hand at needle felting Efco's polystyrene balls!
You will find project sheets for these in the Special Occasions section of Projects4Crafters.com.
Thursday, 27 November 2014
No Sew Felt Advent Calendar
Sorry everyone, don't know what happened there, but somehow I missed a Friday, but to make up for it I'm posting this Friday's blog post an hour early ;) ...
If like me you've left it too late to get that all important Lego Star Wars Advent Calendar you could do what I've just done... make your own. It doesn't take long to create an advent calendar using felt sheets and you don't have to be able to sew either!
Materials needed:
Efco Dark green 4mm felt sheet (70 x 45cm)
4 Efco Dark red 1mm felt sheets (20 x 30cm)
1 Efco White 1mm felt sheet (20 x 30cm)
Efco Wooden 6mm dowel (50cm)
Efco Felt numbers for advent calendar
2 Efco Art fur 20mm ribbon (2m)
Efco Felt snowflakes
Uhu Low melt glue gun & sticks
Decorative trim
Chalk pencil, Scissors, Knife, Ruler & Cutting mat

Step 1. Stick the wooden dowel approximately 3cm from the top edge leaving the ends sticking out evenly either side.

Step 2. Glue along the edge of the felt and fold it down, wrapping it around the dowel. Top Tip: Use a long ruler to press it firmly in place.

Step 3. Cut 24 10cm squares from the red felt sheets. Top Tip: If using a knife and ruler to cut out felt make sure the blade of your knife is new (ie. very sharp) or else it will just 'tear' the felt.

Step 4. Cut 24 4cm squares from the white felt sheet.

Step 5. Stick the red felt advent numbers in the centre of the white felt squares. Fold over one edge of the red squares to turn them into 8 x 10cm rectangles. To keep it folded add a dab of glue at both ends only. (If you glue all along the flap it will make it too stiff.) This will be the top edge of your pocket. Stick the fluffy fur trim over the top of each flap, again only gluing at each end. Run a line of glue down the centre of each white felt square to stick it in the centre of the red pocket.

Step 6. Use a chalk pencil to mark out the 24 8cm squares on the green felt sheet. You will need to leave a 2cm border at the bottom and side edges, 3cm between each column and 2.5cm between each row of pockets. (You should end up with 4 columns of 6 pockets.) (Please note the bottom edge of the sheet is at the top in the picture above.)
Top Tip: Don't worry about marking the top of each pocket as I did in the picture as you will only have to 'rub' this line out when you have finished.

Step 7. Run a line of glue down one side of a marked square and stick the edge of a pocket in position. It's up to you if you want to put the pockets in a sequential order or mix them up as I did. Then run a line of glue down the other side and stick the pocket edge down, hiding your chalk lines.

Step 8. To get the bottom edge of your pocket to lie flat, allowing room for you to fill it, you need to put 2 small pleats in the felt, in line with the edges of the white square. To do this press it down with your fingers to 'crease' the felt before lifting it up, applying a thin line of glue underneath and then sticking it down firmly.

Step 9. To finish off your pockets (and to hide any stray glue) add some decorative trim to the bottom edges.

Step 10. Add any further decoration you want such as Efco's delightful white felt snowflakes.

Step 11. To finish attach a length of trim or ribbon to either end of the dowel as a hanger.

Step 12. Fill your pockets! I ended up buying a smallish Lego kit which I opened up and, using the instruction manual as a guide, split the pieces into 24 consecutive stages. Each pocket was filled with a small bag of pieces with a tag to say which couple of pages of instructions had to be followed. So, hopefully, by Christmas eve my nephew should end up with 3 Super hero characters and 2 small vehicles and, provided he doesn't cheat, he won't know what they are until he has completed them... it'll be interesting to see if he can bear the suspense!
As you can see there was no sewing involved in this project but if you enjoy sewing there's nothing to stop you using a sewing machine to create this advent calendar instead of a glue gun. By using a glue gun it only takes a few hours to make and, if looked after, could be used again and again!
If like me you've left it too late to get that all important Lego Star Wars Advent Calendar you could do what I've just done... make your own. It doesn't take long to create an advent calendar using felt sheets and you don't have to be able to sew either!
Materials needed:
Efco Dark green 4mm felt sheet (70 x 45cm)
4 Efco Dark red 1mm felt sheets (20 x 30cm)
1 Efco White 1mm felt sheet (20 x 30cm)
Efco Wooden 6mm dowel (50cm)
Efco Felt numbers for advent calendar
2 Efco Art fur 20mm ribbon (2m)
Efco Felt snowflakes
Uhu Low melt glue gun & sticks
Decorative trim
Chalk pencil, Scissors, Knife, Ruler & Cutting mat
Step 1. Stick the wooden dowel approximately 3cm from the top edge leaving the ends sticking out evenly either side.
Step 2. Glue along the edge of the felt and fold it down, wrapping it around the dowel. Top Tip: Use a long ruler to press it firmly in place.
Step 3. Cut 24 10cm squares from the red felt sheets. Top Tip: If using a knife and ruler to cut out felt make sure the blade of your knife is new (ie. very sharp) or else it will just 'tear' the felt.
Step 4. Cut 24 4cm squares from the white felt sheet.
Step 5. Stick the red felt advent numbers in the centre of the white felt squares. Fold over one edge of the red squares to turn them into 8 x 10cm rectangles. To keep it folded add a dab of glue at both ends only. (If you glue all along the flap it will make it too stiff.) This will be the top edge of your pocket. Stick the fluffy fur trim over the top of each flap, again only gluing at each end. Run a line of glue down the centre of each white felt square to stick it in the centre of the red pocket.
Step 6. Use a chalk pencil to mark out the 24 8cm squares on the green felt sheet. You will need to leave a 2cm border at the bottom and side edges, 3cm between each column and 2.5cm between each row of pockets. (You should end up with 4 columns of 6 pockets.) (Please note the bottom edge of the sheet is at the top in the picture above.)
Top Tip: Don't worry about marking the top of each pocket as I did in the picture as you will only have to 'rub' this line out when you have finished.
Step 7. Run a line of glue down one side of a marked square and stick the edge of a pocket in position. It's up to you if you want to put the pockets in a sequential order or mix them up as I did. Then run a line of glue down the other side and stick the pocket edge down, hiding your chalk lines.
Step 8. To get the bottom edge of your pocket to lie flat, allowing room for you to fill it, you need to put 2 small pleats in the felt, in line with the edges of the white square. To do this press it down with your fingers to 'crease' the felt before lifting it up, applying a thin line of glue underneath and then sticking it down firmly.
Step 9. To finish off your pockets (and to hide any stray glue) add some decorative trim to the bottom edges.
Step 10. Add any further decoration you want such as Efco's delightful white felt snowflakes.
Step 11. To finish attach a length of trim or ribbon to either end of the dowel as a hanger.
Step 12. Fill your pockets! I ended up buying a smallish Lego kit which I opened up and, using the instruction manual as a guide, split the pieces into 24 consecutive stages. Each pocket was filled with a small bag of pieces with a tag to say which couple of pages of instructions had to be followed. So, hopefully, by Christmas eve my nephew should end up with 3 Super hero characters and 2 small vehicles and, provided he doesn't cheat, he won't know what they are until he has completed them... it'll be interesting to see if he can bear the suspense!
As you can see there was no sewing involved in this project but if you enjoy sewing there's nothing to stop you using a sewing machine to create this advent calendar instead of a glue gun. By using a glue gun it only takes a few hours to make and, if looked after, could be used again and again!
Friday, 7 November 2014
Free Wirework Jewellery Tutorials
Good news!... We have a warm house again - woohoo!
Bad news...The house is still not completely back to normal yet... but then I am taking the opportunity to do a little (extremely late or, as I like to think of it, very early) spring cleaning and sorting whilst everything is in disarray. At least I've just about put every room to rights except my studio (otherwise known as the dining room, lol), which admittedly is somewhat frustrating, but at the same time understandable if you could see the amount of important craft materials (or 'stuff/junk' as others call it) that I have in there. At least I should have more space in there now seeing as I spent last Friday moving the last of my brother's furniture (an armchair and dining room table) from our house to his :), hence why I didn't get a chance to blog last week. :(
So, as I still haven't quite cleared my desk to be able to photograph the latest ideas I've got for some last minute crafty Christmas pressies I thought I'd do a little more surfing the digital waves for some wirework jewellery inspiration and free tutorials for anyone interested.
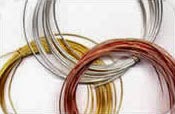 Wirejewellery.co.uk has a great intro to wirework eg. which wire gauges to use for which technique.
 Domestic Diva has some great projects with photo step-by-steps to get you started.
 Spoilt Rotten Beads retail website also has some free projects and jewellery instructions that might be of interest such as this nest ring.
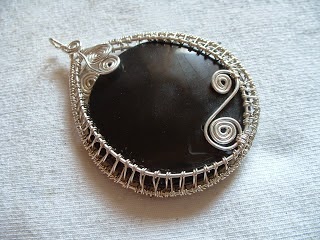 Theresa's 'Flight Fancy' blog page has instructions for this wire wrap woven pendant which is rather lovely and will introduce you to wire wrapping if you've never done it before.
 Last but not least, here's a spiral wire ring from Zoraide and her website Art-Z Jewelry. You'll find instructions for other projects on her blog pages too, not to mention, a whole heap of inspiration in her assorted galleries.
Jewellery Maker tv has assorted free jewellery video tutorials, including wirework ones and you'll find further inspiration on the facebook pages of some of their designers such as Alison Tarry and Laura Binding.
If you have a certain amount of experience already you may be interested in some inspiration for your own projects. In which case you may be interested in...
 Abby Hook and her beautiful wirework jewellery pieces. She also has tutorials available for purchase as well as 6 free ones you can request to be emailed to you.
And of course this list would not be complete without mentioning the amazing Rachel Norris...
 Not only can you find Rachel Norris on Jewellery Maker tv and Facebook but she's also in Beads & Beyond Magazine this month. Rachel's work is truly stunning and she has some Tutorial DVDs available for purchase.
And as always, don't forget to check out Pinterest...just search for wirework jewelry tutorials and you're bound to find at least one or two tutorial links of interest to you.
Happy wrapping...(and not the paper kind... at least not quite yet, eh!?)
Bad news...The house is still not completely back to normal yet... but then I am taking the opportunity to do a little (extremely late or, as I like to think of it, very early) spring cleaning and sorting whilst everything is in disarray. At least I've just about put every room to rights except my studio (otherwise known as the dining room, lol), which admittedly is somewhat frustrating, but at the same time understandable if you could see the amount of important craft materials (or 'stuff/junk' as others call it) that I have in there. At least I should have more space in there now seeing as I spent last Friday moving the last of my brother's furniture (an armchair and dining room table) from our house to his :), hence why I didn't get a chance to blog last week. :(
So, as I still haven't quite cleared my desk to be able to photograph the latest ideas I've got for some last minute crafty Christmas pressies I thought I'd do a little more surfing the digital waves for some wirework jewellery inspiration and free tutorials for anyone interested.
Jewellery Maker tv has assorted free jewellery video tutorials, including wirework ones and you'll find further inspiration on the facebook pages of some of their designers such as Alison Tarry and Laura Binding.
If you have a certain amount of experience already you may be interested in some inspiration for your own projects. In which case you may be interested in...
And of course this list would not be complete without mentioning the amazing Rachel Norris...
And as always, don't forget to check out Pinterest...just search for wirework jewelry tutorials and you're bound to find at least one or two tutorial links of interest to you.
Happy wrapping...(and not the paper kind... at least not quite yet, eh!?)
Friday, 24 October 2014
Free Polymer Clay Tutorials
Soapstone is still off the menu (hence why no post last week) as the new boiler has only just made it onto the wall today. :S The men arrived 8 days late and it is now day 4 of a 3 day job with day 5 still to come...woo hoo! At least with any luck we may have heating by the end of the tomorrow, which considering the weather has taken a turn to the cooler side is just as well.
Anyhoo, as I still can't get to my craft desk to photograph my soapstone jewellery, I decided to do a little surfing today to find some free polymer clay tutorials and websites that might be of interest to you.
So here goes...
 No 1 - Polymer Clay Central - A heart cane with photographic step-by-steps by Candice Mathewson.
 No 2 - Artybecca - A resist technique from Becca of Pittsburgh, Pennsylvania
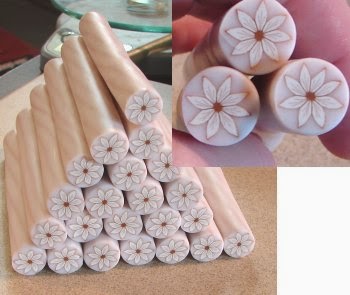 No 3 - Bead Goodies - A great tutorial for making consistently good canes from Candice Mathewson.
 No 4 - Starless Clay - Rainbow Daisy Pen Tutorial from Amber Elledge.
 No 5 - Livemaster.ru - A Russian site but it has a fabulous autumn leaf tutorial with step-by-step photos which you should be able to understand without too much help from Google translate.
 No 6 - Naera on Deviant Art - There are some great pictorial step-by-step instructions for assorted little characters which could be used for either sugar craft or polymer clay decorations.
 No 7 - Artsy Clay: creations & inspirations - A tutorial for how to combine Alcohol Inks with polymer clay.
 No 8 - Manualidades para niños - If you like Minions you'll love this pictorial instruction for creating your own little minion :)
 No 9 - Le Blog de Bounette - You'll find loads of inspiration on this French blog by Françoise Hecquet including some pictorial tutorials for how she creates some of her polymer clay items. (She even has a book out!)
 No 10 - Beadazzle Me - Wonderful instructions for How to Make a Polymer Clay Mold for polymer jewelry using grasses by artist Sherri Kelberg.
 No 11 - L'Atelier de Jancydol (The Jancydol Workshop) - The French blog of Genevieve Dolosor has loads of inspiration for aspiring polymer clay artists.
 No 12 - ST-Art-Clay - You'll find some stunning inspiration and great colour combinations on this flickr site.
Don't forget that there is always Pinterest too... just type 'polymer clay' in the search box and you'll find loads of wonderful photos with links to all manner of amazing polymer clay sites such as Polymer Clay Daily.
Happy modelling to all those polymer clay artists out there! :)
Anyhoo, as I still can't get to my craft desk to photograph my soapstone jewellery, I decided to do a little surfing today to find some free polymer clay tutorials and websites that might be of interest to you.
So here goes...
Don't forget that there is always Pinterest too... just type 'polymer clay' in the search box and you'll find loads of wonderful photos with links to all manner of amazing polymer clay sites such as Polymer Clay Daily.
Happy modelling to all those polymer clay artists out there! :)
Friday, 10 October 2014
Fashion trends for 2014/15
New boiler trumps blog post this week!
Well, I had a soapstone jewellery blog post planned for this week but unfortunately our boiler has packed up and needs to be replaced. So.... instead of being able to take photos of the samples I wanted to share with you I am having to try and condense all my craft stash (and yes, I have a mountain to shift) so that our plumber can get to all the radiators! :(
So, I'm afraid I've had to postpone my planned post until next Friday...but here's a taster of what will be coming next week...

In the mean time, if you're planning on making jewellery for Christmas presents for family or friends this year, you might be interested in Pantone's report on fashion colour trends for Autumn/Winter 2014 and Spring 2015. That way you can make sure that your jewellery will co-ordinate with any new outfits in their wardrobe. :)
Pantone Colour Trends for Fall 2014

Leatrice Eiseman, executive director of the Pantone Color Institute®, says that 'this is a season of untypical colours - more reflective of the imagination and ingenuity, which makes an artful collection of colours and combinations not bound by the usual hues for fall. There is a femine mystique that is reflected throughout the palette, inspired by the increasing need for women everywhere to create an individual imprint.' This should make it ideal for creatives making unique pieces of jewellery as presents!
Pantone Colour Trends for Spring 2015

This season, cooler and softer colour choices with subtle warm tones follow a minimalistic en plein air theme, taking a cue from nature. There is an emphasis on the cooler and softer side of the colour spectrum, with bold colour taking a more supportive role as an accent.
'An eclectic, ethereal mix of understated brights, pale pastels and nature-like neutrals take centre stage as designers draw from daydreams of simpler times. Remembrances of retro delights, folkloric and floral art, and the magical worlds of tropical landscapes restore a sense of wellbeing.'
Happy crafting everyone! :)
Well, I had a soapstone jewellery blog post planned for this week but unfortunately our boiler has packed up and needs to be replaced. So.... instead of being able to take photos of the samples I wanted to share with you I am having to try and condense all my craft stash (and yes, I have a mountain to shift) so that our plumber can get to all the radiators! :(
So, I'm afraid I've had to postpone my planned post until next Friday...but here's a taster of what will be coming next week...
In the mean time, if you're planning on making jewellery for Christmas presents for family or friends this year, you might be interested in Pantone's report on fashion colour trends for Autumn/Winter 2014 and Spring 2015. That way you can make sure that your jewellery will co-ordinate with any new outfits in their wardrobe. :)
Pantone Colour Trends for Fall 2014
Leatrice Eiseman, executive director of the Pantone Color Institute®, says that 'this is a season of untypical colours - more reflective of the imagination and ingenuity, which makes an artful collection of colours and combinations not bound by the usual hues for fall. There is a femine mystique that is reflected throughout the palette, inspired by the increasing need for women everywhere to create an individual imprint.' This should make it ideal for creatives making unique pieces of jewellery as presents!
Pantone Colour Trends for Spring 2015
This season, cooler and softer colour choices with subtle warm tones follow a minimalistic en plein air theme, taking a cue from nature. There is an emphasis on the cooler and softer side of the colour spectrum, with bold colour taking a more supportive role as an accent.
'An eclectic, ethereal mix of understated brights, pale pastels and nature-like neutrals take centre stage as designers draw from daydreams of simpler times. Remembrances of retro delights, folkloric and floral art, and the magical worlds of tropical landscapes restore a sense of wellbeing.'
Happy crafting everyone! :)
Subscribe to:
Posts (Atom)