Hi Everyone,
Valentine's Day is just around the corner so here's a few Valentine themed project ideas for you...
 |
This is an Efco plywood heart shaped box.
A stencil was used as inspiration for the pattern. It was traced onto the lid with a pencil and then a pyrography tool used to burn it into the wood. A touch of red paint was picked up on a baby wipe and lightly applied over the top, intensifying at the edges and in the hearts. A hint of gold was applied to the leaves and extreme edge. Several strands of gold thread were knotted through the 3 heart shaped wooden buttons befor they were stuck on. |
|
 |
| The sides were coloured with a baby wipe and red paint (intense at the top, fading to the bottom). Gold paint was applied on top of the red to the side of the lid and a 5mm strip of red velvet paper stuck in the middle. Red velvet hearts were punched using a Grand Calibur and Spellbinders Scallop Heart Die. 2 small cuts were made in each one to allow a gold ribbon to be threaded through before being stuck to the side of the box. |
 |
You can easily create personalised mugs using Efco's Color Dekor 180ºC
Just punch out or cut your desired shapes, place them in water for a few moments to allow you to slide them off their backing sheet, position them on your mug, squeezing out the excess water and leave to dry for 24 hours. Then bake them in an oven at 180ºC for 30 mins to make them hand washable. The Color Dekor comes in a variety of colours as well as Chinese Calligraphy and Black or Gold letters. |
 |
| Don't forget you can decorate the bottom of the mug as well - an ideal place for a surprise or fun message! |
If you are planning on giving a small Valentine's gift this year then why not make your own packaging like these delightful little bags:
 |
| Mini Valentine Bags are easy to make if you have a Spellbinders Heart Die Set and Grand Calibur machine. Just cut and emboss 2 large hearts from card and decorate them as desired. Cut a strip of card 4 x 15cm. Score and fold this in half (ie 7.5cm) and 1cm in from the edge on both long sides (see photo). Cut a small triangle from either side at the centre to enable you to fold it slightly more than 90º. Use double-sided tape on the flaps to stick the strip between the two hearts and attach the ribbon handle. |
If you can't find the perfect Valentine's card or just enjoy making your own unique handmade cards then here are a few quick ideas (all of which use the Spellbinders Dies)...
 |
| Run a piece of white card through the Grand Calibur in an embossing envelope and cut to size for your card. Run your card through with an Edgeabilities Die on the right front edge. (Make sure to open your card up first so you only cut the front of the card.) Take a piece of pink card and run that through with the same Edgeabilities Die and line it up with the front cut edge of the card before sticking it to the inside edge of the card. Use pale pink chalk to pick out a feature of the embossed card and attach a small piece of ribbon with a small pink brad. Stick the embossed card to the front and trim the edges. Stick a narrow ribbon down the left edge to finish. |
 |
| You can use the heart dies to create small popups in your card. Punch several hearts from pink paper and fold them in half. Stick the halves back to back before sticking them in the middle of your card. |
 |
| You don't have to go for a traditional folded card. You can create a pocket card by cutting out two hearts and sticking the edges together with narrow double-sided tape. Decorate the front as desired and punch out a smaller heart to write your message on before popping it inside. |
 |
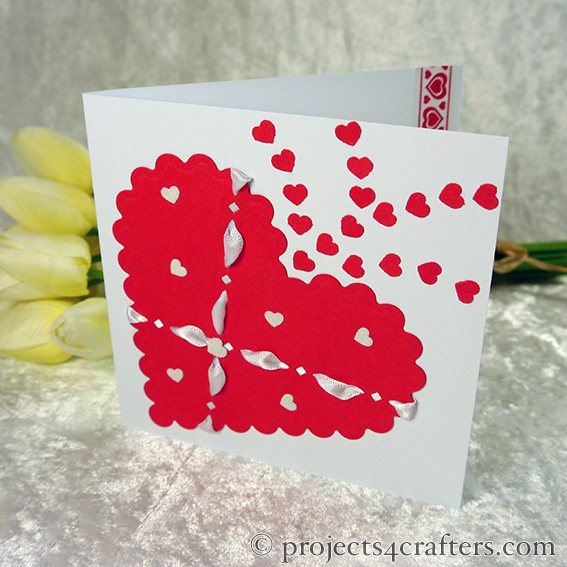
| You can use the Spellbinders Edgeabilities Inserts Dies to create patterns across cut out shapes as well as using them in conjunction with their border dies. Here Classic Decorative Inserts One has been laid across in two different directions and punched. A ribbon was then threaded through the holes and the ends wrapped around the stuck to the back before the heart was fixed to the card. |
 |
| A very simple but effective card can be created by punching out a heart and then embossing it in an embossing folder. Punch small holes down either side and thread a narrow organza ribbon through. Tie 3 small bows and stick them over the top holes and the bottom point of the heart. Stick the heart to your card. |
You don't just have to cut and emboss flat shapes with the Spellbinder's Nestabilities Dies either. The project below shows how, with a little simple paper folding before using the scalloped heart die, you can create a card with a difference. Perfect for that special Valentine's message! Check it out at: http://www.projects4crafters.com/Special-Occasions-Cards(2296643).htm
'til the next time... Happy Crafting!
Fee x


No comments:
Post a Comment