Thursday 28 March 2013

March Update

Hi Everyone


Last Saturday I was at the Ideal World studios doing 2 live Efcolor enamelling shows on their Create and Craft channel. Wow, what a day! Martyn and Genevieve were great and the viewers absolutely lovely. They were so enthusiastic that we sold out of most of the kits by the end of the first show which didn't leave me much to demonstrate with in the second! But it was such a great day I didn't mind that the weather had decided to make life difficult and snow, yet again. (I seem to be jinxed when it comes to the weather and traveling to Peterborough.)

Having said that though, I was very lucky when I discovered my car had decided to pack up on me the night before - after all, I could have got stuck half way up the A1 before I found out! After a moment of panic wondering how I was going to get there, I spent a further 30 minutes panicking as I trawled the internet trying to find a car rental firm that could let me pick up the car first thing the next morning. Fortunately, I found one close by and when I arrived to pick it up, was absolutely delighted to receive a free upgrade! I've never driven such a posh car in the UK. The closest I ever got to anything like it was when I drove a Lexus in the States, but even that didn't have a camera in the back that automatically switched on when reversing into a driveway - now that's high tech!

I've just uploaded another wirework project for anyone who fancies trying their hand at jewellery making...


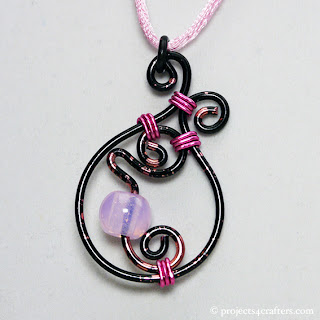
B/0026 - Spiral Pendant

If you prefer larger pendants you can use the same wire wrapping technique but on a larger frame - just use a pot (or anything that is the size and shape you want your frame to be) as your former.


If you prefer smaller pendants you can use small beads as a central feature and then wire wrap around them. For the pendant below, I've used some of Efco's 0.6mm copper core wire and the herring bone wrap.


Here's an alternative version of Project B/0024 - Squiggle Pendant, this time using Efco's Red Gold Duo Wire with a red big hole feature bead.


If you've been getting into wirework like me do please send in photos of your creations as I'd love to see them and I'm sure everyone else would too! You can send them to gallery@projects4crafters.com or post them on the Projects4Crafters facebook page.

'til the next time, Happy Crafting...

Fee x

Monday 18 March 2013

March's Featured Product

Hi Everyone

The featured product for March is Efco's fab new range of Coloured Wires. There are 21 plain colours in six different styles an 14 duo colours. There's 1mm plain wire and 2mm plain, diamond and embossed patterned wires. There are also 2 flat wires (1mm x 5mm), one which is plain and the other embossed. The range of colours is gorgeous and they all work wonderfully together!

If you've never done wirework before I've got some projects to get you started:


You'll need to invest in some pliers and wire cutters if you don't already have any in your tool kit. It's worth purchasing some of Efco's Protector Tubes too as these will stop the pliers marking the wires. They are plastic tubes which you slide over the ends of your pliers and then heat with a rubber stamp embossing gun to shrink them to fit the ends snugly. (They get damaged over time so will need replacing on a regular basis if you plan to do alot of wire work.)


Here are a few other examples of what you can create when working with wire:


Hope this has inspired you to give it a try!

Happy Crafting

Fee x

Saturday 16 March 2013

Wire Flower Topper

Hi Everyone

Hope you're managing to stay warm despite the horrendously cold weather - a good excuse for staying indoors and crafting! :)

 
Here's how you can create a wire flower card topper like the one pictured above.


Step 1. Wrap 1mm wire around the Efco roller tube 5 times,
leaving approx 2-3 inches of excess wire at either end.


Step 2. Slide the wire off the tube and holding the rings secure
in one hand use jewellery pliers to put a kink in them.


Step 3. Carefully fan the rings without distorting them too much.


Step 4. Take the excess wire from the top and, wrapping it
around to the back, thread it up through the middle of the rings.


Step 5. Hold the rings secure in one hand whilst you use
pliers to pull the wire tight. Wrap the wire around the rings a
second time, again pulling tight.


Step 6. Take the other wire end and start curling it into a spiral.


Step 7. Keep curling it until you have used up all the excess wire.
Then fold it up and over the front of the flower in the centre.


Step 8. Turn the flower over and trim the excess wire from the end
used to bind it. Use pliers to tuck the cut end into the back.


Step 9. Take a length of green 1mm wire and bend it in half. Thread
the ends through the bottom petals either side of the centre.


Step 10. Twist the ends together a few times.


Step 11. Take one wire and wrap it once around the roller tube.


Step 12. Twist the wires together again a few more times
without removing the roller tube.


Step 13. Slide the wire off the roller tube and use jewellery pliers
to put a kink in the ring.


Step 14. Repeat the process to create another leaf
on the other side of the stem before twisting the wires
a few more times and trimming the excess.

As you can see it's very easy to create the wire flower and stem. Then all you need to do is fix it to your card - I used a hot glue gun.

Happy Crafting

Fee x

Friday 8 March 2013

Tissue Paper Flowers

Hi Everyone

It's Mother's Day this Sunday so why not get the kids making some tissue paper flowers for all those wonderful ladies that have one of the hardest jobs on the planet...


How to make them...
Cut at least 8 rectangles of tissue paper.
(There are 14 approx. 15 x 25 cm pieces pictured here.)

Stack the pieces of tissue up and fold them in a concertina fashion
 (These have been folded at approx 1.5cm.)

Take a piece of green 1mm wire and wrap it around the centre of the folded tissue. Twist it to secure the tissue.

Trim the ends of the tissue into rough petal shapes.

Cut down the folds of the tissue paper to lengthen the petals.
(These have been cut approx. 2.5cm.)

Pull the two ends of the tissue paper sections round until they meet.

Carefully tease the first layer of tissue paper petals up to the centre.

Continue in a similar fashion with each layer of tissue paper.
(Don't worry if, as it starts to fill out, you tear an odd petal or too.)

If a stronger stem is desired, take a piece of 2mm green wire and hook this over the centre of the paper concertina and wrap the ends of the 1mm wire around to secure it.

As the flower starts to fill out, start at the other end by teasing the bottom layer of tissue down and work back towards the middle.

When all the layers of tissue have been separated shape the flower with your hands, teasing petals into position where necessary.

Your finished Mother's Day flower!

These flowers are simple to do and a lot of fun to make so...

Happy Crafting!

Fee x