Friday, 20 March 2015

Easter's on it's way....

Hi all, sorry I missed last week too... these builders are soooooo demanding! Tea, coffee, biccies...and now we're onto donuts! Before you know it they'll be demanding bacon sarnies too, lol! But then, when they are doing such a fabulous job on my nu studio shed how can I begrudge them, eh?!...


Anyhoo, I have managed (in between all the interruptions) to get a downloadable project sheet for the Sutton Slice Technique up on the website, under the Polymer Clay tab.


With Easter fast approaching I've also designed a quick and easy Easter Basket project which is ideal for presenting a selection of mini Easter Eggs or even a few primroses (provided you line the basket first).


Easter Basket


You will need:

Efco Papp Art Basket
Efco Ivory Decoupaint
Cernit Glamour: Carmine Red, Skin Colour, Yellow, Mauve, Light Green & Green
Efco Flowers Texture Mat
Cernit Blades & Roller
Polymer Clay Pasta Machine (Optional)
Efco Molding Plate Mini Press
Flowers and Leaf Cutters
Gold Brads
Flat Brush, Craft Knife, Super Glue & Baby wipes
Ceramic Tile, Kitchen Foil, Oven Thermometer & Oven


1. Paint the Papp Art basket with several coats of cream Decoupaint, leaving to dry between coats.


2. Condition the carmine red clay either by massaging it in your hands, repeatedly rolling it out on a ceramic tile or running it through a pasta machine several times. (nb. If you use a pasta machine for polymer clay NEVER use it again for food.)


3. Start pushing lumps of clay into the recesses of the Flowers texture mat. Make sure you smooth out the joins as if they show on the top they will show underneath in your finished pattern. Fill the entire mat with clay.


4. Use the Cernit flexible blade to remove all excess clay. Hold the blade as flat as possible whilst you cut slivers of clay, always cutting towards the outside edges. You should be able to see all the raised surface of the design.


5. Condition the skin coloured clay before rolling it out to about 1mm thick. (You can pass it through the pasta machine, starting on the thickest setting and reducing until about the 5th setting.) Lay the clay sheet over the top of the filled texture mat. Lay the plastic sheet on top before pressing down with the molding plate.


6. Remove the molding plate and carefully flip the texture mat, clay and plastic sheet over onto a ceramic tile. Press down on the back of the texture mat with your fingers to help the clays to adhere to one another.


7. Give a quick roll over the back of the texture mat with the Cernit roller before carefully checking that all the edges are adhered as you remove the mat.


8. Gently press down on the raised surface to make sure all the carmine red clay is firmly adhered.


9. Cut out 3 large flowers and 2 small flowers using the cookie cutters.


10. Carefully remove the excess clay from the plastic sheet.


11. Gently peel the flowers off the plastic sheet and insert a gold brad into the centre of each one. Make little rings of kitchen foil to support them whilst they bake. Bake following the manufacturer's instructions (30 mins @ 130ºC).


12. Repeat Steps 2-11 for the yellow and mauve clays. 

Then repeat Steps 2-11 again with the two green clays, this time using a leaf cutter instead of the 2 flower cutters and draping them over a roll of foil instead of little rings.


13. When cool lay your flowers and leaves on the basket to work out what position you want them in. (I used 3 large flowers and 2 small flowers in contrasting colours with 3 leaves on either side, but you can mix it up how you like.) 

Use a craft knife to cut small slits in the papp art basket to enable you to feed the ends of the brads through. Open out the ends on the inside to secure the flowers.


14. Use little dabs of Super Glue to stick the leaves in position.


For a finishing touch you could tie a ribbon to the basket handle before filling with lots of yummy mini Easter eggs and bunnies...positively scrumptious!


Alternatively, you could line the basket with plastic and fill it with a few Easter flowers such as primulas or pansies.

For a free downloadable version of this project go to the Polymer Clay page of Projects4Crafters.com

Happy Crafting! (oh and munching too!! :) )


Friday, 6 March 2015

Sorry, no post this week...

I've been so busy with the builders all week that I didn't get my planned post finished :( Sorry!... but when you've got such lovely builders you have to keep them fed and watered otherwise they end up lying down on the job!...lol


Friday, 27 February 2015

Efco Texture Mats

Well, rain stopped play yesterday, yet again, groan! The garden is officially a mud bath! Can't decide whether I should change tack and instead of building a shed open a spa offering mud facials, the Glastonbury experience (without the music that is), a World War I re-enactment opportunity, a pottery, a pig farm or a hippo sanctuary! lol


Thankfully my builders are a happy bunch and don't mind getting stuck in the mud...quite literally (they even had to dig the digger out!).

There has been a lot of interest in Efco's wonderful new Texture Mats. With them you can create fantastic pieces of jewellery with quite intricate polymer clay designs using the Sutton Slice technique - it's easy! 

Materials List
Cernit Clay (two colours)
Efco Texture Mat
Cernit Clay Knife Set
Cernit Roller or Pasta Machine (Optional)
Efco Jewellery Backing - Trapezoid Ring
Efco Ring Holder
Ceramic Tile
Swarovski Crystal


Step 1. Condition one of the colours of clay - whichever one you want to use as the foreground colour in your design ie. the one that will go into the Texture Mat. To make it easier to condition the clay, you can use a roller or pass the clay through a pasta machine several times. (Whatever tools you use with polymer clay eg. pasta machine, make sure you don't use them in food preparation afterwards - all tools used for clay should be kept for use with clay only.) 


Step 2. Take a lump of conditioned clay and push it into the mat. You need to cover an area larger than your chosen jewellery backing. Don't try and cover the whole area in one go and don't try to apply the clay too thinly because the clay is more likely to lift out of the mat crevices if you do. Better to apply it in thick chunks and spend more time removing the excess.


Step 3. Add more lumps of clay as necessary, until you have covered enough of the texture mat. Make sure to blend the sections of clay, working the joins until you can't see them. (If you can see the join on the top you will be able to see the join underneath which will show on your finished piece.)


Step 4. Make sure you have covered enough of the Texture Mat by checking against your finding. If you have just enough area covered for your finding with no excess you won't have enough covered because when you start removing the excess clay the edges will become ragged and unusable.


Step 5. Start shaving off the excess clay using the flexible Cernit knife. Always work out towards the edges of the clay. Try to keep the knife as flat as possible so that the back of the knife pushes the remaining clay into the mat whilst removing a slice. Don't try and remove it all in one go as you are more likely to remove all the clay not just the excess.


Step 6. Continue removing slices of clay until you can see the raised pattern of the Texture Mat.


Step 7. If you find some clay comes out of an area don't try and refill that one hole. Instead add a lump of clay pushing it into the mat before slicing off the excess.


Step 8. Make sure you can see the red raised areas of the Texture Mat, if not your finished design will not be quite so sharp.


Step 9. Take the second clay colour and work it until it is conditioned.


Step 10. Push the conditioned clay into the jewellery backing. 


Step 11. Remove the excess clay using the stiff Cernit blade. Hold it as flat as possible and, starting at the centre, cut across the finding (making sure the blade spans across both sides of the finding). Turn the finding around and remove the remaining excess clay by slicing the other way.


Step 12. Use your finger to smooth out the clay in the finding, making sure that it fills the recess right up to the edges.


Step 13. Flip the finding over and press it onto the clay covered area of the Texture Mat.


Step 14. Flip the mat over with the ring still attached and press on the back of the mat to make sure all the sections of clay have bonded. Then carefully flex the mat around every edge of the finding to check that all the sections that overlap the edges are stuck to the clay in the finding rather than still in the mat. 


Step 15. Slowly peel back the mat checking that all the clay from the mat is stuck to the clay in the finding.


Step 16. Gently press the raised surface of the clay to make sure it is completely adhered to the backing clay.


Step 17. Use the stiff Cernit blade to trim the excess clay from the edges of the finding. (Cut downwards as if trimming the edges of a pie to prevent distortion of the clay.) n.b. The trimmed bits of clay could be a combination of the two colours so don't combine it with the rest of your excess clay if you want to keep your colours pure.


Step 18. Use a lump of the same coloured clay to remove the excess clay still in the Texture Mat. You will find it easier if you flex the mat as you do this. 


Step 19. If you want to add a Swarovski crystal or two, do so now. Position it where you want and then carefully push it into the clay.


Step 20. Bake the clay according to the manufacturer's instructions (~30 mins at 110-130ºC). If baking a ring, it is wise to use the Efco ring stand so that as the clay softens during baking the pattern does not distort. The clay will shrink very slightly as it bakes so, if the clay falls out of the finding once 'fired', use a little superglue to stick it back in. (n.b. Don't forget to wash your hands after working with polymer clay.)


If you use two colours that are tonally the same or are shades of the same colour you will end up with a subtle effect. If you use two colours that are strikingly different you will have a more stunning finish.

As you can see it is easy to create amazing polymer clay jewellery with Efco's Texture Mats!

Click here if you want to see all the designs available in the Efco polymer clay Texture Mat range.

Happy crafting! :) 


Friday, 20 February 2015

Paracord Weaves

Here I go again... making excuses for not blogging. (Note to self: must try harder!!) The last month has been uber busy with prepping for the big craft trade show, Stitches, held at the NEC, Birmingham. Add to that the fact that the builders started work on prepping the space for my brand new studio shed a fortnight ago (whoopee!) and as I'm sure you can imagine, I've been doing an excellent impression of a headless chicken of late! 

Anyway, I'm back now, recovering from 3 days non-stop demos and workshops (lost my voice yet again and now fighting off a cold, boo hoo) and getting ready to get some brand new project sheets up on the website.

In the meantime, in light of the response I received at Stitches over Paracord braiding, I thought I'd share some great paracord links to some free pattern and weave instructions...


This is the Viper Paracord Weave, instructions for which can be found at: HowtomakeaParacordBracelet.com


This is the Wheat Stalk Braid (another of my personal favourites) and you can view the YouTube video to find out how it's done.


This is the first and most basic paracord weave, sometimes called the Cobra (otherwise known as the Macramé Square Knot). You can find instructions for this one at: Instructables.com. Or for the Macramé Square Knot go to: StoneBrashCreative.com. Alternatively, if purchasing Efco's 4m packs of cord you will find the instructions inside the packet. On this bracelet you can see that I've added an Efcolor enamelled oval blank as decoration on top using some of Efco's transparent nylon thread.


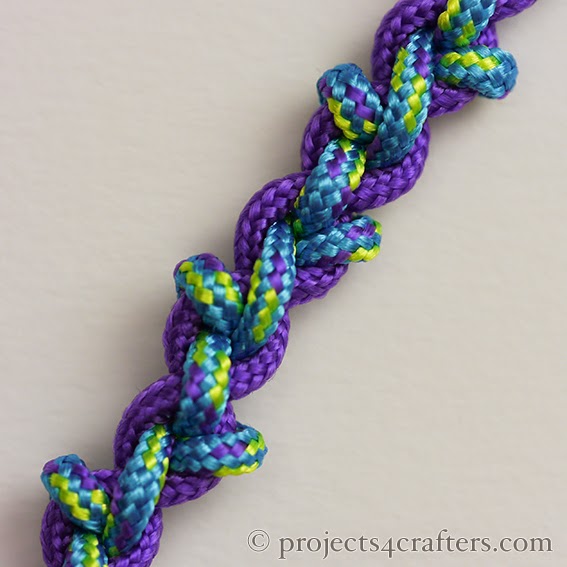
This is the Bound Endless Falls Braid, instructions for which can be found along with a whole host of other braids on FusionKnots.com.

Of course when creating Paracord Braids you don't have to leave it there. You can add other embellishments such as embossed metal shapes, large holed beads and even make your own beads as embellishments from Cernit and Efco's new Texture Mats...


Efco Metall Art embellishments on a Cobra Paracord Braid with one of Efco's new metal click buckles.


Efco's large holed beads on some of their 2mm cords.


Cernit beads created using Efco's Texture Mats and a small round cutter.

Paracord looks set to rise in popularity over the coming months and should appeal to boys and girls of all ages. And bracelets are not the only things you can create using this technique either. You can create keyrings, bag handles and belts etc. and if you're fed up with the wintery weather we are experiencing at the moment then start planning a holiday to somewhere hotter by decorating some flip flops...


These flip flops are being decorated using the basic Macramé Square Knot around the strap. I joined two cords by heating the ends and sticking them together whilst still hot before I started weaving from one side to the other.

I will be uploading various Paracord project sheets soon so keep an eye on the Facebook page over the coming weeks for news on those.

Happy Crafting everyone! :)