Wednesday, 19 June 2013

New Neon Efcolor Powders!

Hi Everyone

Just thought you'd like to see the new Neon Efcolor Powders that are now available...


Aren't they fabulous!

And here's what you can do with them...


I can't wait to create more pieces with these gorgeous colours and I'd love to see what you do with them too.

Happy Enamelling!

Fee x

Friday, 14 June 2013

Create and Craft Collage Show

Hi Everyone

Wow... what a great show! It was lovely working with the delightful Debbie Shore again and the response from the audience was fab! If you were unable to watch the show here is a taster of what you missed... 

 
Efco's Aquarium pack is ideal for creating fish tank cards.

Efco Stampbord shapes from the embellishment pack are ideal for creating enamelled embellishments. Here the number 5 has been used to create an enamelled badge.

You can use stencils to create patterns with Efcolor.

You can embed Efco Stampbord shapes in Efcolor on another blank!

You can create background with Efcolor and then rubber stamp on top.

Efco Stampbord shapes are ideal for creating unique card toppers.

You can embed Swarovski Crystals in Efcolor powder when enamelling.

Create your own stencils using a craft punch and a piece of card.

This blank can be found in either the Timeout or Seventies pack
and is perfect for using with the Efcolor Roses Stencil.

You can embed rub ons in Efcolor - just make sure they are firmly
attached before you cover them with a thin layer of transparent powder.

Efcolor alumnium blanks are perfect for creating unique handmade cards.

This example using the cool set of powders that are available from Create and Craft.

You can embed items such as silk flowers into Efcolor powders.
Just make sure you have a good thick layer of powder and when it is melted remove the blank from the heat and press you flower into the enamel.

You can use stencils to create patterns with Efcolor.
You can heat your blanks several times so that way you can do each colour separately!

The Noah's Ark pack of blanks is great for creating cards
or as embellishments for scrapbook pages such as this page.

The Noah's Ark pack of blanks can be used to create a Safari Scene.

You can use anything that has holes in it to create your patterns.
Here I've used some lace.

The 80 x 80 square blanks are perfect for making Post-it note blocks
And you can embed wire in Efcolor powders too!

These pieces are from the Seventies pack of blanks
(just to show you you don't have to do them in 'seventies colours'!)

You can use Efco's Aquarium pack to create your own mini fish tank wall art.
(For instructions check out the Efcolor Enamelling Page.)

To create the pattern here, I used a Spellbinders die cut.

A cupcake wrapper was used to create the pattern on this piece.


 As you can see there was lots going on!

Hope you can catch my next Create and Craft show which will be on 22 June at 3pm. This time I will be making Efcolor enamelled Christmas Decorations... yes I know, Christmas seems to come earlier and earlier each year but Create and Craft are doing a whole week of Christmas shows in June so it really will start early this year! Having said that if you have been crafting a while you'll know that you really do need to make a start on your Christmas cards soon if you plan to handcraft them all yourself!

Hope you can join me on the 22nd! 
(http://www.createandcraft.tv/ShowGridView.aspx)

Fee x

Monday, 3 June 2013

Efco Home Fair 2013

Hi Everyone

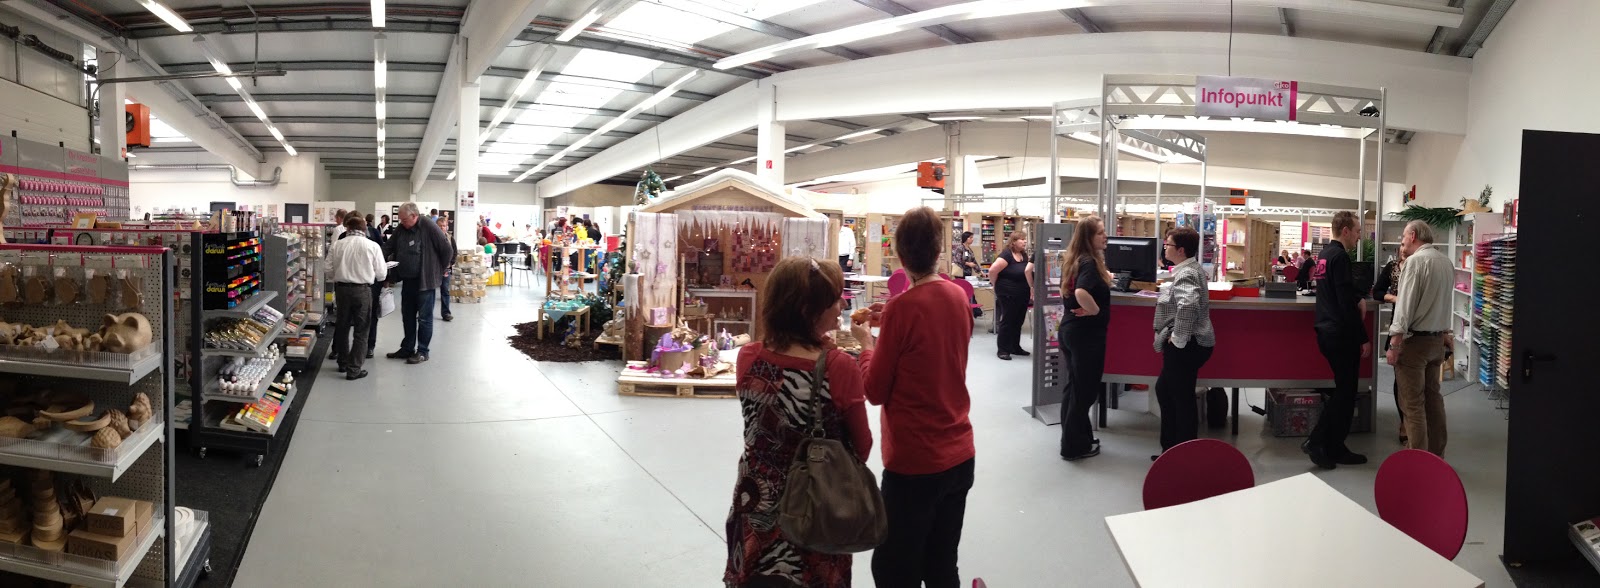
I've just got back from Germany and Efco's Home Fair. They certainly know how to put on a show at HobbyGross Erler. Their customer centre is very impressive with loads of lovely craft products on display. There were four enclosed workshop rooms as well as plenty of space for four make and take areas and a large area to sit and relax over lunch. The food was abundant and really delicious! (Well worth the price of the plane ticket alone!) I got to see all the lovely new products that are coming out over the next few months which was really exciting. (The only problem is... we've got to wait for some of them until September and I want them now!) 

Anyway, here's a few photos I took whilst I was there to give you a flavour of the Fair...

Efco Customer Centre
Entrance Hall Decorated Wall
Inside Efco's Customer Centre
Martin and Pia Erler
(brother & sister owners of Efco)
Sandra Nicola
(The amazing lady who created the Efcolor wall clock you can see on my facebook page
having seen the Efcolor 'Seventies' panel I posted.)
A fabulous display showing some new products
William Weil (from Sinotex, Efco Distributor for the UK)
getting stuck in with some new clay on a Make & Take

Here are a few photos showing some of the new products that will be available from Efco over the coming months...

New Efcolor Buckles

New Efcolor Butterfly Copper Blank

One of the New Efcolor Letter Copper Blank Ranges

New Efcolor Seahorse Blanks

New Neon Bead Range

New Neon Wools

New Papp Art Bookends

New Papp Art Bookends

New Papp Art Night Light Holder

Cernit Polymer Clay Range - new to Efco

Darwi Ceramic Pen Range - new to Efco

New Silk and Cotton Ranges

Exciting new additions to the Efco Stencil Range

As you can see there are lots to look forward to... personally, I can't wait until the new Efcolor alphabet ranges are available in September! 

Don't forget... I'll be demonstrating Efcolor enamelling on Create and Craft in the Collage Show on 13th June at 12 noon. Check it out at: http://www.createandcraft.tv/ShowGridView.aspx

Hope to see you there!

Fee x

Friday, 31 May 2013

The New Website is live!

Hi Everyone

Just to let you know that the new Projects4Crafters.com website is now live so if you haven't already checked it out please do so and let me know what you think - I'd love to hear your views! :)

Here's a few screen shots to give you an idea of what it looks like...


Thanks

Fee x

Friday, 24 May 2013

Efcolor Enamel Stove Shield

Hi Everyone

It's been a busy few weeks with getting the new Projects4Crafters.com website up and running. But it's there at last and it has bags more space for lots of free craft projects to be added over the coming months! :)

One thing I have been asked about a couple of weeks ago was the shield I used on one of the Create and Craft Creative Jewellery TV Shows. They have some rather over zealous air conditioning in the studios due to all the camera lights and the first show I did there I was positioned under one of the air-con vents. I ended up not being able to enamel a single copper blank during the hour long show as the tealight flames were positively horizontal (meaning the top of the stove never got hot). As such I needed to find a way to protect the stove in case I found myself in the same position again.

Unfortunately I'm not aware of any shield that is available to purchase at this time that is suitable for the Efcolor Tealight Stove. However, in desperation (and with the help of a very inventive father) I did manage to create one. So for anyone out there who loves using their Efco Efcolor Tealight Stove but is being constantly frustrated by drafts or plans to do some enamelling outdoors here's how I made mine.


Homemade Efcolor Enamelling Stove Shield

Materials needed:
Piece of Perspex
Sharp knife
Drill
Section of drainpipe
Boiling and Cold Water
Heat Protective Gloves
and most importantly (if you're like me)... A Handy Man!

Cut a piece of perspex 520 x 126 mm and drill three 8mm holes 40mm from the bottom edge (one of the long sides). These should be evenly spaced at 130mm, 260mm and 390mm from one edge (one of the short sides). Place a section of drainpipe (or something similar) across your kitchen sink and lay the perspex across it. Make sure whoever is going to bend the perspex around the pipe is wearing heat protective gloves. (I used some NASA thermal gloves inside a pair of thick gauntlet rubber gloves.) Concentrating on a small section at a time pour boiling water over the perspex whilst encouraging it to bend around the pipe. As soon as a section has curved around the pipe pour cold water over it to set it. Keep working on the perspex until you are happy with the overall shape. You should end up with a circular shape with a gap in it that is approx 220mm in diameter. When placed around the tealight stove it should protect it from drafts whilst being far enough away to allow air circulation (so the tealights aren't starved of oxygen) and to stop it getting too hot. Please note this is a homemade solution to draft problems when working with the tealight stove and not only have I found it effective, I haven't experienced any problems with it either. However, if you make one yourself and if, at any time, you feel it is too close or starts to get hot remove it from the stove and allow it to cool. 

To download the template for the Homemade Efcolor Tealight Stove Shield go to the Information Sheet page on the Projects4Crafters.com website.

One last thing I should mention to anyone who is experiencing problems with enamelling on the Efcolor tealight stove. I have found that tealights can vary quite dramatically depending on where you get them. Once upon a time supermarket shelves were filled with night lights and not many tealights. These days I struggle to find night lights as everything seems to be labelled as a tealight. However, I think that the labelling may be incorrect as night lights are designed to produce light without a lot of heat whereas tealights are supposed to give off heat and most of the tealights these days appear to be scented (not much good if you're wanting to keep your chinese food warm). I've tried various brands of tealights and quite often find that they aren't producing enough heat to melt the Efcolor powder as well as they should. (The best test for this is the silver or black texture powders - they don't really separate and give that gorgeous two toned finish if they don't get heated to the correct temperature ie. 150ÂșC). The cheap ones from the supermarkets and cheap jack shops just don't get hot enough. I did try some deeper ones made from stearin once but they got too hot and made the enamel pull and wrinkle so definitely avoid those. So far the most reliable ones I've found are from Ikea.

Hope this helps all those budding enamellers out there - I'd love to see photos of any Efcolor enamelling anyone's done so do send your photos in to either gallery@projects4crafters.com or post them on the facebook page.

Happy Enamelling

Fee x