Friday, 31 May 2013

The New Website is live!

Hi Everyone

Just to let you know that the new Projects4Crafters.com website is now live so if you haven't already checked it out please do so and let me know what you think - I'd love to hear your views! :)

Here's a few screen shots to give you an idea of what it looks like...


Thanks

Fee x

Friday, 24 May 2013

Efcolor Enamel Stove Shield

Hi Everyone

It's been a busy few weeks with getting the new Projects4Crafters.com website up and running. But it's there at last and it has bags more space for lots of free craft projects to be added over the coming months! :)

One thing I have been asked about a couple of weeks ago was the shield I used on one of the Create and Craft Creative Jewellery TV Shows. They have some rather over zealous air conditioning in the studios due to all the camera lights and the first show I did there I was positioned under one of the air-con vents. I ended up not being able to enamel a single copper blank during the hour long show as the tealight flames were positively horizontal (meaning the top of the stove never got hot). As such I needed to find a way to protect the stove in case I found myself in the same position again.

Unfortunately I'm not aware of any shield that is available to purchase at this time that is suitable for the Efcolor Tealight Stove. However, in desperation (and with the help of a very inventive father) I did manage to create one. So for anyone out there who loves using their Efco Efcolor Tealight Stove but is being constantly frustrated by drafts or plans to do some enamelling outdoors here's how I made mine.


Homemade Efcolor Enamelling Stove Shield

Materials needed:
Piece of Perspex
Sharp knife
Drill
Section of drainpipe
Boiling and Cold Water
Heat Protective Gloves
and most importantly (if you're like me)... A Handy Man!

Cut a piece of perspex 520 x 126 mm and drill three 8mm holes 40mm from the bottom edge (one of the long sides). These should be evenly spaced at 130mm, 260mm and 390mm from one edge (one of the short sides). Place a section of drainpipe (or something similar) across your kitchen sink and lay the perspex across it. Make sure whoever is going to bend the perspex around the pipe is wearing heat protective gloves. (I used some NASA thermal gloves inside a pair of thick gauntlet rubber gloves.) Concentrating on a small section at a time pour boiling water over the perspex whilst encouraging it to bend around the pipe. As soon as a section has curved around the pipe pour cold water over it to set it. Keep working on the perspex until you are happy with the overall shape. You should end up with a circular shape with a gap in it that is approx 220mm in diameter. When placed around the tealight stove it should protect it from drafts whilst being far enough away to allow air circulation (so the tealights aren't starved of oxygen) and to stop it getting too hot. Please note this is a homemade solution to draft problems when working with the tealight stove and not only have I found it effective, I haven't experienced any problems with it either. However, if you make one yourself and if, at any time, you feel it is too close or starts to get hot remove it from the stove and allow it to cool. 

To download the template for the Homemade Efcolor Tealight Stove Shield go to the Information Sheet page on the Projects4Crafters.com website.

One last thing I should mention to anyone who is experiencing problems with enamelling on the Efcolor tealight stove. I have found that tealights can vary quite dramatically depending on where you get them. Once upon a time supermarket shelves were filled with night lights and not many tealights. These days I struggle to find night lights as everything seems to be labelled as a tealight. However, I think that the labelling may be incorrect as night lights are designed to produce light without a lot of heat whereas tealights are supposed to give off heat and most of the tealights these days appear to be scented (not much good if you're wanting to keep your chinese food warm). I've tried various brands of tealights and quite often find that they aren't producing enough heat to melt the Efcolor powder as well as they should. (The best test for this is the silver or black texture powders - they don't really separate and give that gorgeous two toned finish if they don't get heated to the correct temperature ie. 150ÂșC). The cheap ones from the supermarkets and cheap jack shops just don't get hot enough. I did try some deeper ones made from stearin once but they got too hot and made the enamel pull and wrinkle so definitely avoid those. So far the most reliable ones I've found are from Ikea.

Hope this helps all those budding enamellers out there - I'd love to see photos of any Efcolor enamelling anyone's done so do send your photos in to either gallery@projects4crafters.com or post them on the facebook page.

Happy Enamelling

Fee x


Monday, 29 April 2013

Wire Rose Ring

Hi Everyone

I had a fabulous day with the crafters at The Craft Patch on Saturday - what a lovely and talented group of ladies (and gentleman) they were too! There were a lot of creative ideas flying around during the course of the day, for example Fiona Morgan thought that stringing several felt flowers (Project Sheet F/0011M) together would make a fabulous scarf. (The video for how to make a felt poppy will be available soon!)

Here are a few of the lovely ladies...


                                                    ... and I'm looking forward to seeing all the wonderful felt and wirework projects they create!
 
For those of you who have been wondering what you can do with Efco's flat coloured wires here's one idea:

Wire Ribbon Rose Ring

This ring is made with one length of Efco's flat wire.
It can be made with either style of wire but the embossed wire reflects the light more dynamically giving the ring extra dimension.
 

Materials needed:

32cm of Flat Coloured Wire
Ring Mandrel
Flat Nosed Pliers (with Protector Tubes)
Wire Snips

All materials available from Efco

Mark the ring mandrel with a pencil for the required size. Cut a ruler's length of wire & wrap it around the ring mandrel at the marked point, twisting the wire ends around each other to secure it.

Use flat nosed pliers to bend the wire out in places as you wrap the ends around each other in a spiral fashion.

Continue to bend the wire out in places as you wrap the wires around in an ever growing spiral.

Continue in the same vein until the rose is as large as you'd like.

When the rose is the desired size bend the wire ends so that the wire is flat to the mandrel, allowing you to tuck the ends under the edges of the rose at either side of the ring band.

Side the ring off the mandrel and turn it over. Cut the excess wire so that the ends are hidden by the rose.

The finished ring!

Hope you like the ring. Do feel free to leave any comments - I'd love to hear what you think or if you have a better idea!

As always... Happy Crafting!

Fee x 

Friday, 19 April 2013

Wet Felted Medallions

Hi Everyone

Here's a quick how-to for making Wet Felted Medallions which can be turned into beads by threading them onto eyepins...

Felted Medallions

Material List
 Efco Superfine Merino Wool Tops
Bubble Wrap & Towel
Efco Filz-Fix Set
Hot & Cold Water
Scissors, Eyepins, Pliers & Wire Cutters

1. Use the heel of your hand to pull off sections of wool
fibre. Tease them out to spread the fibres and then
lay them horiztonally on a piece of bubble wrap
(bubble side up).
nb. One edge will form the outside of your medallion.

2. Lay more sections of teased out wool fibre
on top of the first layer of fibres at 90Âș (ie vertically).

3. When you have a solid, thick layer of fibressoak them with the Filz-Fix solution.
(2ml of Filz-Fix:100ml Hand Hot Water)


4. Lay another piece of bubble wrap over the top and press
down with your hands to push the liquid through the fibres.
(Do not rub or roll with a rolling pin
as this could start the felting process &
stop the fibres locking together later.)

5. Lift off the bubble wrap and apply more
Filz-Fix solution where necessary.

6. Lay the bubble wrap back over and press down again
to distribute the liquid.
nb. If you are making large medallions and so have a very
thick layer of fibres you will find it easier if you flip the mat
of fibres over whilst it is trapped between the bubble wrap
& apply more filz-fix from the other side.
Remember to flip it back again when it is all wet.

7. Remove the bubble wrap and fold over one end
of the mat of fibres to neaten it to a straight edge.

8. Start rolling the fibres as tightly as possible.

9. Keep rolling until you have a sausage shape.

10. Wrap the fibre roll as tightly as possible
in a piece of bubble wrap.

11. Start massaging the roll, wringing and
squeezing it in your hands.
Unroll the bubble wrap to check that the
fibres are beginning to felt. Reroll them in the
bubble wrap and massage again.

12. Undo the bubble wrap and, provided the
fibres have started to lock together,
gently roll them with your hand.

13. By now the fibres should feel like a loose, floppy roll.
Start rolling them between your hands applying pressure.

14. When the roll of fibres starts to feel firmer
place it in hot water. This will shock the fibres
into locking tighter together.

15. Remove it from the hot water and roll between your hands,
applying as much pressure as possible.
Continue dunking it in the hot water and rolling it in your
hands until the fibres form a firm, solid roll.

16. Rinse the fibre roll in cold water to remove
the last of the Filz-Fix solution.

Wrap the roll in a towel and squeeze
as much water out as possible.
(This will speed the drying process.)

17. When dry, use sharp, heavy duty scissors
to cut medallions from the roll.

18. Use a needle to make a hole which you can
then thread an eyepin through. Curl over the end with
jewellery pliers before trimming the excess.

You can thread your felt medallions onto headpins to create unique earrings!


Happy Crafting!

Fee x


Friday, 5 April 2013

Efcolor Enamelled Watch Strap

Hi Guys

I've had several people asking me how I created the peachy enamelled watch strap that was on the Create and Craft tv Show, so I thought I'd better put it out into cyberspace for anyone else who might also be interested...

Efcolor Enamelled Watch Strap

Materials Needed:
Copper Blank Set - (90 050 21)
Basic Efcolor Powder Set - (03 717 10)
Efcolor Tealight Stove - (93 717 06)
Wooden Clothes Peg or Heat Resistant Pad
Scrap Paper
Watchface - The Bead Shop
Silver-Plated Copper Wire 0.6mm - (22 200 06)
Swarovski Crystals - (21 050 02)
Silver-Plated Carabineer Findings - (99 214 71)
Jewellery Pliers
Flat Nosed Pliers
Old piece of lace
(Efco Product Codes in brackets)

1. Pour some white Efcolor powder onto a scrap of paper and add a little yellow. Mix them together with your spatula. 

Enamelling the Back:
2. Lightly sand both sides of a copper blank and wipe clean. Pick up some of the mixed Efcolor powder on the end of your spatula and tap it over one side of the blank. When you have covered the blank with a good layer of the powder place it on the tealight stove. When the Efcolor powder has melted, leaving a smooth, glossy finish, remove the blank from the stove and leave to cool. (If necessary, repeat with a second coat.)

Enamelling the Front:
3. When cool, flip the blank over and cover the other side with the same creamy mix of Efcolor powder. This time, place it on the metal stand to heat on the tealight stove. (The more level you get it on the stand the less it is likely to nick the edges of the first enamelled side.) When melted remove the stand from the heat and leave the blank to cool before lifting it off. (Use a clothes peg, pliers or heat resistant pad to lift the stand off the stove as it is very hot and will burn your fingers.) Again, if necessary, repeat with a second coat to achieve a smooth, glossy finish.

4. Take some bright pink and orange Efcolor powders and mix them together on a scrap of paper. (nb. It's a good idea to mix up enough powder for all the blanks so that they match, as it is not easy to mix exactly the same colour twice.) 

5. Lay a piece of old lace over the blank and, picking up some of the peachy mix on the end of your spatula, gently tap the Efcolor powder over the lace. When you have covered the blank with a thin layer of powder carefully lift the lace up and move it to one side. (Try not to tip the lace up as you remove it as the powder sitting on top could fall through the holes onto your blank ruining your pattern - if this happens though, don't worry, as you can tip off the powder, wipe the blank clean and start again.)

6. Carefully lift the blank onto the stand endeavouring not to get the peachy Efcolor mix on the back of the blank. Place the stand back on the stove to heat. When the powder has melted, remove the stand from the heat and leave to cool before removing the blank.

7. Repeat the process for the other three blanks.

Making up the Watch Strap:
8. Use jewellery pliers to bend a piece of wire at 90Âș approx 1.5-2 inches from the end. Start to wrap the bent wire around the end of the pliers, leaving a gap. Loop the end of the wire through one hole of a blank so that it sits in the ring you've created. Take the end and, using pliers to pull it tight, close up the ring, wrapping the end twice around the wire to secure it. Trim the excess. 

9. Thread a Swarovski crystal on the other end before repeating the process to attach another blank. Make sure when you bend the wire you leave a little gap after the crystal as otherwise you won't be able to wrap the wire around to secure it.

10. Connect the other two blanks in the same way.

11. To attach the watch face put a 90Âș bend in a piece of wire approx. 2 inches from the end. 2mm towards the end from this first bend, bend it back on itself around the pliers and thread the end through one hole of the watch face finding. Bend the wire around the other side of the finding until it crosses over the other end of the wire. Wrap the end twice around the wire before trimming the excess.

12. Attach one of the copper blank sections in the same way as above but this time without adding a crystal. (If a longer watch strap is needed you can thread on a Swarovski crystal as above.)

13. Repeat for the other side of the watch face.

14. Attach a wire to one end of the strap in the usual way. Decide whether or not you wish to add a Swarovski crystal - it depends on how long you need it to be. Then attach a jump ring to the other end of the wire before wrapping it to secure it in the usual way.

15. Repeat for the other end of the strap but this time attach the clasp.

As you can see, decorating the copper blanks is easy and, if you have a little jewellery making experience, making up the strap is easy too!

Happy Crafting!

Fee x

Thursday, 28 March 2013

March Update

Hi Everyone


Last Saturday I was at the Ideal World studios doing 2 live Efcolor enamelling shows on their Create and Craft channel. Wow, what a day! Martyn and Genevieve were great and the viewers absolutely lovely. They were so enthusiastic that we sold out of most of the kits by the end of the first show which didn't leave me much to demonstrate with in the second! But it was such a great day I didn't mind that the weather had decided to make life difficult and snow, yet again. (I seem to be jinxed when it comes to the weather and traveling to Peterborough.)

Having said that though, I was very lucky when I discovered my car had decided to pack up on me the night before - after all, I could have got stuck half way up the A1 before I found out! After a moment of panic wondering how I was going to get there, I spent a further 30 minutes panicking as I trawled the internet trying to find a car rental firm that could let me pick up the car first thing the next morning. Fortunately, I found one close by and when I arrived to pick it up, was absolutely delighted to receive a free upgrade! I've never driven such a posh car in the UK. The closest I ever got to anything like it was when I drove a Lexus in the States, but even that didn't have a camera in the back that automatically switched on when reversing into a driveway - now that's high tech!

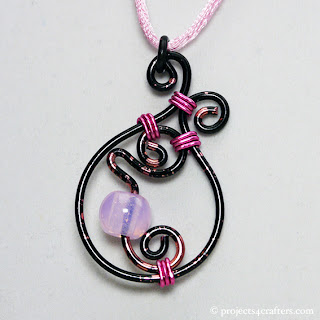
I've just uploaded another wirework project for anyone who fancies trying their hand at jewellery making...


B/0026 - Spiral Pendant

If you prefer larger pendants you can use the same wire wrapping technique but on a larger frame - just use a pot (or anything that is the size and shape you want your frame to be) as your former.


If you prefer smaller pendants you can use small beads as a central feature and then wire wrap around them. For the pendant below, I've used some of Efco's 0.6mm copper core wire and the herring bone wrap.


Here's an alternative version of Project B/0024 - Squiggle Pendant, this time using Efco's Red Gold Duo Wire with a red big hole feature bead.


If you've been getting into wirework like me do please send in photos of your creations as I'd love to see them and I'm sure everyone else would too! You can send them to gallery@projects4crafters.com or post them on the Projects4Crafters facebook page.

'til the next time, Happy Crafting...

Fee x

Monday, 18 March 2013

March's Featured Product

Hi Everyone

The featured product for March is Efco's fab new range of Coloured Wires. There are 21 plain colours in six different styles an 14 duo colours. There's 1mm plain wire and 2mm plain, diamond and embossed patterned wires. There are also 2 flat wires (1mm x 5mm), one which is plain and the other embossed. The range of colours is gorgeous and they all work wonderfully together!

If you've never done wirework before I've got some projects to get you started:


You'll need to invest in some pliers and wire cutters if you don't already have any in your tool kit. It's worth purchasing some of Efco's Protector Tubes too as these will stop the pliers marking the wires. They are plastic tubes which you slide over the ends of your pliers and then heat with a rubber stamp embossing gun to shrink them to fit the ends snugly. (They get damaged over time so will need replacing on a regular basis if you plan to do alot of wire work.)


Here are a few other examples of what you can create when working with wire:


Hope this has inspired you to give it a try!

Happy Crafting

Fee x