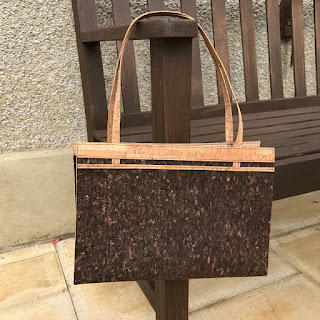
Hi Everyone
Here's the instructions for how to create the small cork leather bag I promised Hochanda viewers on my last show...
Materials:
Cork Leather Sheet (Marron) 45 x 35 cm (3370600)
Cork Tape 5mm x 100 cm (3374005)
Cork Tape 10mm x 100 cm (3374010)
Cork Tape 20mm x 100 cm (3374020)
Sewing Machine & Thread
Wonder Clips & Pencil
Small piece of Mountboard
Scissors, Knife, Ruler & Cutting Mat
Step 1. Cut a 7 cm strip from the long edge of a piece of cork leather. Cut 2 x 18cm long pieces from the strip and from both pieces cut a 5 mm square from two corners (see photo).
Step 2. Mark the centre of the large cork piece and the middle of the two side gussets. Place the side pieces on the main piece, wrong sides together, lining up the marks and the side edges.
Step 3. Sew approx 5mm in from the edge along the bottom of each gusset.
Step 4. Position the 5mm cork tape approx. 25mm from the edge of the short sides of the bag. (You can use the 20mm tape as a guide if desired.) Sew down the middle of the 5mm tape, securing the ends with back stitching. Trim the ends flush with the Marron cork.
Top Tip: When sewing the tapes in position across the top of the bag make sure you overhang the tape at either end as it tends to travel a little whilst sewing. This will stop it appearing to be too short at the edges.
Step 5. Cut the 10mm cork tape in half. Position the ends approx. 3cm from the side edges, butting them up to the 5mm tape.
Step 6. Sew the ends in position with a square of stitching going onto the 5mm tape to firmly secure the handle ends. (See photo)
Step 7. Sew the 20mm tape along the top edge of the bag on either side, trimming the ends as necessary.
Step 8. Line up the side seams with the gusset on either side and sew them approx. 5mm from the edge.
Step 9. You will need to finish the corners by hand as they will be too tight for the sewing machine.
Step 10. Cut a piece of card 27 x 6.5 cm to help shape the base of the bag.
There are four different cork leather designs available: Marron is the only dark one so you get a great contrast with the cork tapes, but there are also Granulo, Mosaic and Stripes if you prefer a lighter coloured bag.
Cork is also available as paper and fabric (The fabric is called Tissue but it is definitely fabric with a woven backing and not tissue.) Both the leather and fabric can be hand washed and ironed on a low setting.
Happy Crafting!


